|
Photo #1:
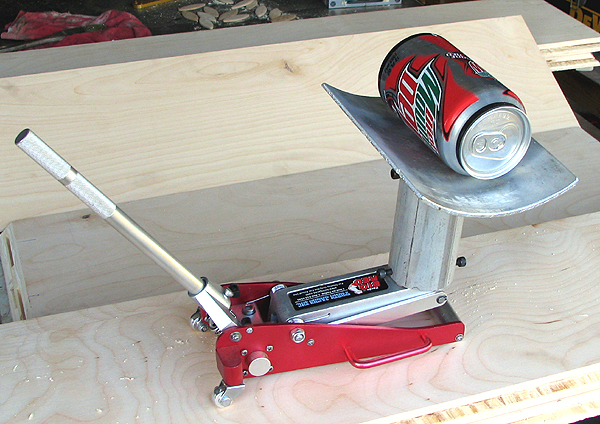
I've posted this photo elsewhere, but here it is again, this time as 'chapter one' of a complete story. Here's the prototype "Helmholtz Resonator" I made, to demonstrate to my satisfaction that I could, indeed, scratchbuild a whistle that toots.
The brass 'tubing' is actually pipe; i.e. 0.50"o.d. and 0.40"i.d. with a thicker wall than the stuff K&S sells thru hobby shops. |
|
|
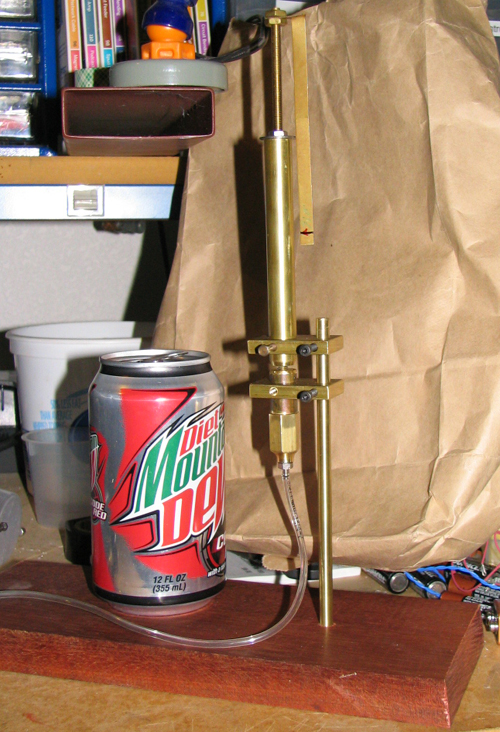
Photo #2:
Closeup of the business end of the
resonator. The bottom end of the top tube has a
bevel, but the top end of the bottom tube is cut
square. The
reflection
of the upper taper makes the bottom one appear to have a matching taper but it doesn't.
There's a breakdown of all the elements that make up the innards in Photo #8. |
|
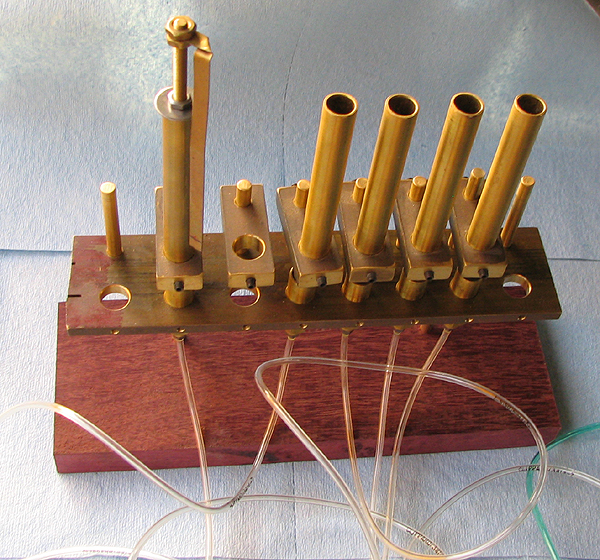
| Photo #3: Once I had one working I made a set to complete a rudimentary 'octave' of 8 whistles. Note my 'slide whistle' contraption on the left. Da plan was to use this to tune each pipe individually, then cut and cap each at an appropriate length. But I found that it was very difficult to get a complete octave of notes. I suspect the diameter of the tube was restricting my tonal reach. Or maybe it's my total lack of any musical ability, heh. |
|
| Photo #4: A calliope needs a keyboard so here's my pseudo-steampunky version. Turns out these key-valve assemblies were a royal PITA to get working reliably. I've since discovered an off-the-shelf Clippard MAV-2 poppet valve does the same thing for $6.69 and, wallet permitting, I can eventually buy all I need. |

|
| Photo #5: Opposite side of keyboard. Note addition of quick-connect fittings. These are tremendous timesavers, particularly at this stage of the project. Eventually they'll be replaced with either hard-soldered or Swageloc fittings that are pressure resistant and (propane) gas-tight. |

|
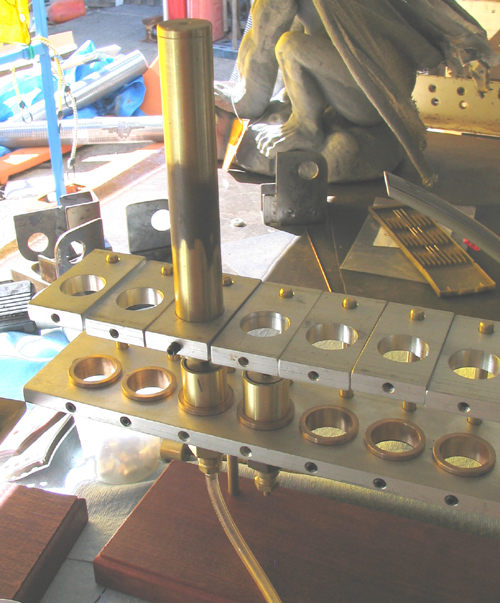
| Photo #6: OK so I got the little manual prototype to work, more or less. I decided to scale it up a bit to try and get more musical range. This scale of pipe meant that I could attach fittings large enough to flow propane at the rate needed to put on a bit of a show. These whistles are 7/8"o.d., 3/4"i.d. and the longest is about 18" tall. |
|
| Photo #7: A little further along on the scaled up version with workbench filling up with various small bits needed to make enough whistles to carry a tune. |

|
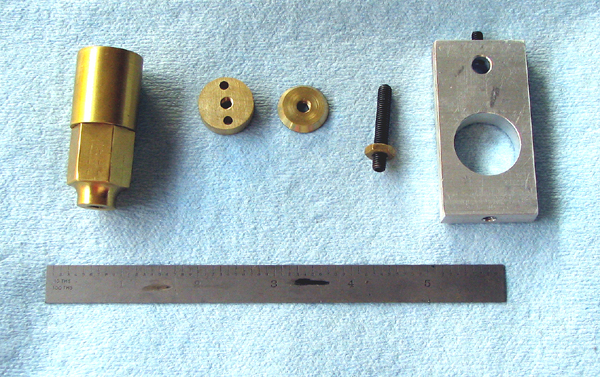
| Photo #8: Assembly on the left is called a foot. Within it are a series of widgets. I'll call the one second from the left a post support. The third one is indeed called a languid and the bit of #10-32 allthread is called the post The aluminum piece on the far right is a nameless part I use to support a length of brass pipe, aka a bell, above the foot. Increasing diameter also meant all components were much easier to machine: if one rolled off of the workbench they were large enough to find, heh. |
|
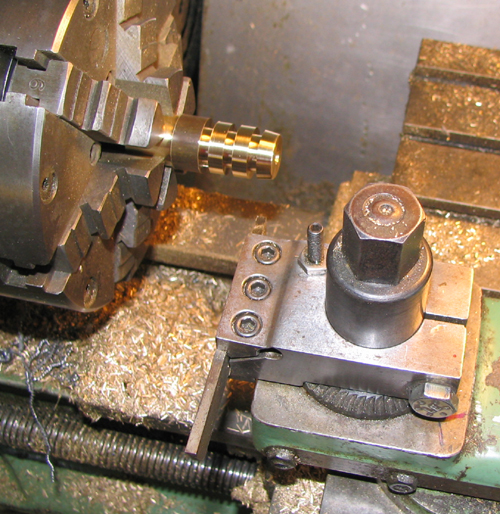
| Photo #9: Lathe setup to machine a few post supports. The real problem was maintaining concentricity with the threaded bore. If I had it to do over I'd press an unthreaded end of the post into a reamed hole in the post support, to better control squareness and concentricity. |
|
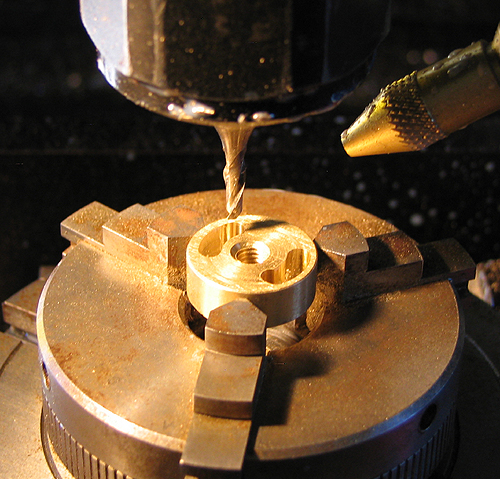
| Photo #10: Last step in making the post support: cut holes for air or propane to pass thru it on its way to the flue. I thought drilled holes would have insufficient surface area, so I got out my modified (to be waterproof) Sherline CNC rotary table and had a go. |

|
| Photo #11: For once a decent, in-focus close-up photo of the 3/4" dia. post support, now sporting a pair of milled air passages. Each is 3/16" wide and covers an arc of 60 degrees. |
|
| Photo #12: Approaching burn-out here; workbench a bit chaotic but most of the machining complete at this stage. Top left: original version; below it the keyboard. Top right: the larger scale contraption. Foreground: piles of necessary components, tooling, etc. Next up: snag some solenoid valves and work on electronics and remembering how to program my Basic Stamp. Oh, and find the top of the workbench! |

|