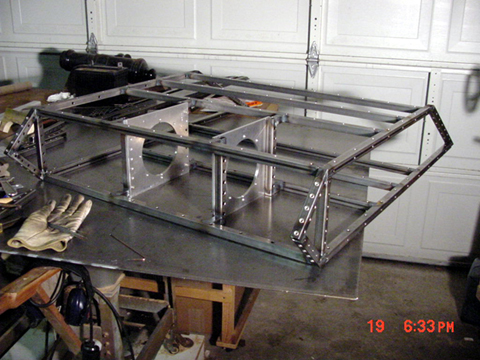
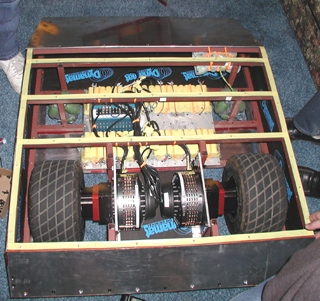
| Photo #1: Rear view of frame. The motors are huge! Their mounting plates are the two aluminum pieces with the large holes in them. The small holes in the frame members are for nut-serts; basically internally threaded pop rivets. Armor and various internal components fasten onto these. There are 297 holes in all: a lot of drilling! |
|
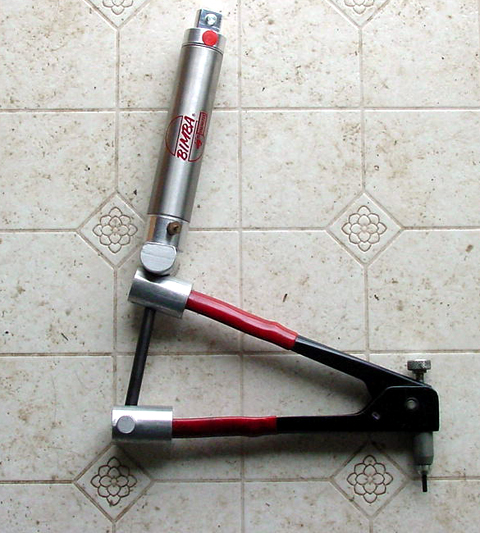
| Photo #2: Nutserts are a convenient way to attach things to thin steel; i.e. it's relatively quick and easy to install a few of them and they are useful for structures that are seldom disassembled. For battlebots they're lousy, but being in a hurry we opted to use them this one time. To facilitate installation of the many nutserts we needed I "automated" a manual insert tool... |
|
| Photo #3: Close up of motor mounting plate. Only 4 bolts are used to secure each plate to the frame. The extra holes allow us to raise or lower the mounts, depending on the terrain we plan to encounter. The large hole was cut with a rotary table. Smaller holes around the larger one were located with a bit of trig. Reason for surface irregularities: the material came from the local junkyard. |

|
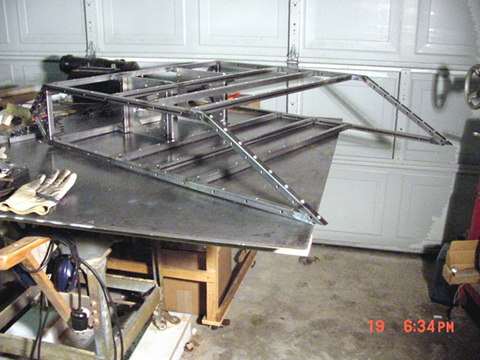
| Photo #4: Front quarter view. This is early days in the construction and struts had yet to be added to reinforce the wedge. |
|
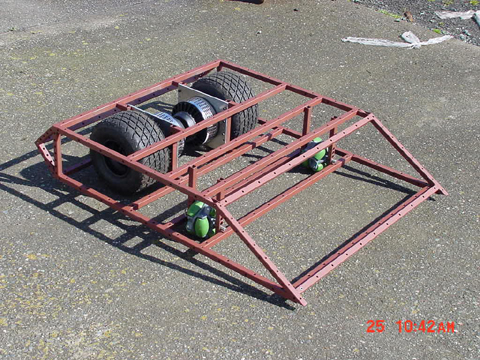
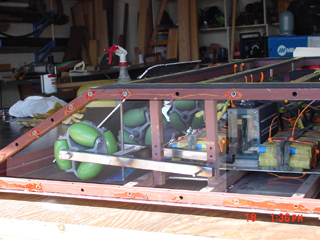
| Photo #5: Frame complete and painted with primer. Motors and wheels installed temporarily to double-check internal clearances. See Photo #8 for more about the green bits... |
|
| Photo #6: Here it is with drive hardware, batteries and armor. Total weight came in nearly 40lbs below the 210-lb limit of the heavyweight class, thanks mainly to the nickel-metal-hydride batteries, which weigh much less than the available alternatives. Pricey, though... |
|
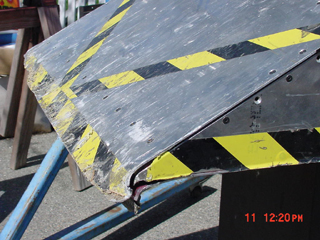
| Photo #7: A little battle damage after driving practice, playing "kick the can" with a 5-gallon bucket of concrete. We chose a tough, but semi-malleable aluminum alloy (6061-T6) for the armor, so this sort of thing can be pounded straight again... |
|
| Photo #8: Design change #1: The "green bits" are called Omni Wheels. They are a form of caster that doesn't need to swivel to roll freely in different directions. Here we're in process of moving the non-driven wheels forward a bit and fitting them with tackle to allow some height adjustment if the frame is bent in an extreme crunch... |
|
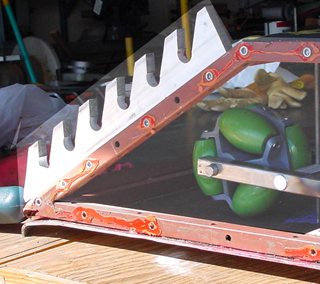
| Photo #9: Design change #2: we're thinking of adding something a little more offensive to the wedge. This should help hang onto anything that tries to roll back off of it... |
|