Potato Guns!!

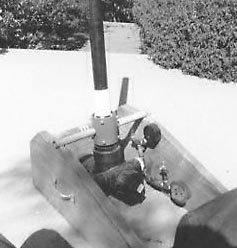
Photo #1: This is the Mark I experimental device. It was designed by several amateur scientists from the SBSMEEBBQ to determine the conditions that take place within potato guns. The pivoting mount allowed the device to be laid horizontally or vertically, which simplifies various calculations.
Measurements have been made of muzzle velocity, chamber pressure, atmospheric pressure, range, altitude, fuel mixture and kinetic energy.
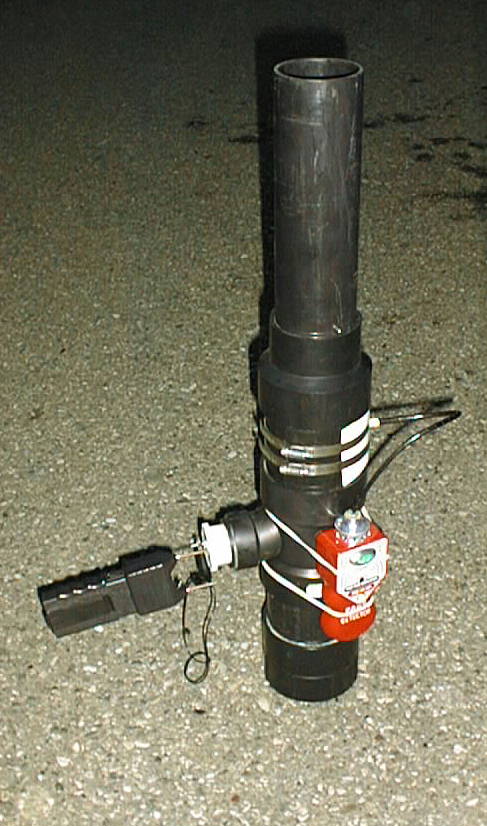
Photo #2: My latest hack is the Mark II, aka the "Fun gun". This is a mortar designed to launch soda cans (full ones) and to test fuel mixture measurement. The barrel is 3in. diameter and about 13in. long. A piece of 1/8in. wire is inserted across the base of the barrel, to prevent a round from falling into the combustion chamber. The red thing is a $39.- "Fart Detector" (available from novelty stores). The sensor has been removed, rewired and extended. Using RTV and hose clamps, I attached the sensor to the top of the combustion chamber. After fuel is admitted through a cleanout plug in the base, the threaded plug is replaced. When fumes reach the detector at the top end of the combustion chamber, the gun is ready to fire. Using jumper cables, a stun gun is attached to a home-made spark plug (made from pieces of stainless welding rod poked through a PVC pipe plug).
With the short barrel It's a good idea to wear ear and eye protection when firing this one: it puts out quite a BOOM and a flash, too!

The following is my attempt at writing a FAQ for would-be spudsters. For more information, consult the links at the bottom of this page.

First, a bit of...

History:

Potato guns, tennis-ball launchers and other explosive devices seem to have been around since the invention of the tube. The earliest reference this author has found is the the lighter-fluid propelled "Colorado Goose Gun", known to have been built in central California as far back as the '60s. This device consisted of a series of steel beverage cans connected in series with tape. The ends were removed from all but the bottom can, which had a small hole punched in its bottom and several "church-key" punches ringing its top, which was taped to the other cans.

The introduction of plastic pipe fittings was many decades ago. PVC offers many advantages over metal cans. The smooth inner surfaces, coupled with the ease of working the material with just a hacksaw and a bottle of glue, as well as the standardization of sizes are the most obvious. Curiously, the first references of the use of PVC fittings to make launchers is less than 5 years old. Once these devices appeared however, the spread of the technology was fairly rapid.

Once the principles were generally known, it was only a matter of time before a crime was committed with one of these formidable force-multipliers. It was no surprise, therefore, when it happened in Oakland in 1993. Bad luck all around with that: the perp was a car-jacker and using a potato gun fueled with hairspray he took a shot at a passing car. The driver's window was smashed, the fellow lost control of the car, which struck a pole. The driver was killed and the charge was murder. After the uproar that followed, potato gun ownership was made a crime, equivalent to possession of a sawed-off shotgun.

However, owing to the availability of parts to the general populace, and to the tendency of folks to want to have a bit of mindless fun, these devices have continued to increase in number. Enforcement has been spotty at best, meaning in most instances, enlightened gendarmes have either tolerated the operation of such devices, or have at most confiscated them. But there have been extreme reactions, where some particularly nasty law enforcement types have decided to make an example of the hapless owner. The moral of the story is: your mileage may vary. How well do you know the people who are holding your leash??

Law and Common Sense

In the spirit of abiding by the law as it stands, all of the information pertaining to the construction of these devices that follows should be considered historical in nature: this is the way it WAS done, way back when, NOT the way you should do it now. The author in no way wishes to endorse the construction, use or ownership of ANY of these devices for any other purpose than scientific curiosity: enlightened awareness of the hows, whys and processes of the physical world can enhance one's enjoyment of our trek to oblivion. I support the notion that things are worth trying in order to learn a bit of science, but never to gain unfair advantage. Any idiot can buy a gun. Many do.

In an attempt to minimize risk, since this author realizes that people will build these things anyway, the following FAQ includes as many caveats as were known as well as a series of "DON'Ts" which cover many, but certainly not all, of the mistakes that can lead to misfortune. Common sense is merely common, not pervasive. Damned fools will be with us until the end of time. This document has been written in an attempt to minimize this propensity.

SAFETY:

First and foremost,
-DO good science: keep track of what you do and
-DO NOT change more than one variable at a time!
-DO NOT point a spud gun at a living creature
-DO NOT fire a spud gun on a windy day
-DO NOT fire a spud gun at night, or on any but clear, sunny days
-DO NOT shoot at aircraft, or when aircraft are nearby
-DO NOT shoot at a fence: a spud gun can fire a spud clean through and produce lots of FAST, deadly splinters, to boot
-DO NOT store a spud gun with less than two ports open
-DO NOT look down the barrel, or blow down the barrel to purge exhaust
-DO NOT use acetylene: it's nasty stuff!
-DO NOT use gunpowder
-DO NOT attempt to rifle the barrel: this weakens the structure.
-DO NOT shoot marbles, golf balls or anything harder or sharper than a tuber
-DO NOT ---well, make up your own and TELL ME, so I can circulate it!!!
-ALWAYS drill a vent-hole somewhere in the combustion chamber, to act as a hang-fire relief-valve. Unscrewing a large diameter plug once detonation has occurred is deadly.
-If you can, use an electronic detonator, similar to those used in model rocketry. Make an extension cord so you don't have to stand right next to the spud gun when you fire it.
-MAKE SURE that there aren't any "downwinders" for 1/2 MILE
-REMEMBER the muzzle velocity of a spud can approach 400ft./sec. A potato has much more mass than a large caliber bullet. Do a bit of math and you will see that a potato has as much or more kinetic energy than a .45 cal. bullet!

Questions and Answers

Tools you would have needed:

--Handsaw or hacksaw to cut the pipe
--Round file to de-burr inside edges
--Flat file to de-burr outside edges and to make a flat, thin spot on the side of the
tee (for the igniter)
--Rags to clean pipe THOROUGHLY before gluing up
--Pocket knife to carve 'taters to fit barrel
--Mallet to drive 'taters into the barrel for tight fit
--1/8" drill bit
--1/4" drill bit
--Large flat-bladed screwdriver to tighten the hose clamps
--Tin snips to cut the galvanized mesh

Here's How They Were Assembled:

  1. 1) Try a trial-fitting without glue, then glue up all of the fittings, except the barrel, making sure that the 3" to 1-1/2" reducer bushing goes in to the center branch of the tee. They really only go together one way, so don't worry. Remember to always use primer before gluing.
  2. 2) Drill a 1/4" hole in the tee, as close to the center of volume as possible, for the igniter. Try to find a space that is relatively thin and free of curves and intersections. NOTE: if you have access to a machine shop, this hole should be counter-bored just large enough to allow the jam nut to be affixed with the aid of a socket wrench.
    WARNING from this point onwards there would exist the danger that the potato gun would spontaneously ignite, as the glue is HIGHLY FLAMMABLE. Any spark from the ignitor might set it off. Any stray spark from static electricity, from your clothes or a fingertip could also set it off! It would be wisest to MAKE CERTAIN that ALL of the screw-on plugs were OUT if you did the following steps!
  3. 3) From the inside, pass the igniter through the hole in the PVC tee. You will notice that the threaded portion just barely makes it through the hole. At this point, take the flat file and thin this section until several threads of the igniter can be seen above the tee. CAUTION: DO NOT make the wall too thin! It is just necessary to get the locking nut to engage a turn or two, to secure the igniter. Secure the nut with a dab of Loctite.
  4. 4) Place the barrel in to the reducer bushing. Mark a point about 3" above where the barrel meets the bushing. Remove the barrel and drill a 1/8" hole all the way through it at this point. Insert the 1/8" welding rod through the holes. Make sure that the rod is a snug fit, but removable.
  5. 5) Cut the welding rod down, bending one end into a convenient gripping-handle. Put it back in the barrel.
  6. 6) Glue the barrel in to the reducer bushing.
  7. 7) Replace the two smaller threaded bushings in the 1-1/2" slip-thread couplings. If you plan to use an electronic igniter, one of these bushings may be drilled out for the igniter to pass into the combustion chamber.
  8. 8) Wrap as much as possible of the combustion chamber with two layers of the 1/4" galvanized mesh. Tighten the hose clamps around the mesh to hold it in place. This mesh is VERY IMPORTANT: it will save you from being perforated by flying fragments of PVC in the event of an explosion.....

--At this point the gun would be ready to fire!
Here's how one would load and fire:

  1. 1) Cut a potato in half, and carve it down to just over-sized to fit the barrel.
  2. 2) Using the mallet, pound it into the end of the barrel.
  3. 3) Using the broom handle, ram it down until it is stopped by the welding rod
  4. 4) After the potato was seated well, the builder would point the gun where he/she wanted the spud to go.
  5. 5) Squirt a bit of butane into the large threaded opening and cap it quickly. It was unwise to use too much, or it wouldn't have a proper mixture and it wouldn't work!
  6. 6) Holding the barrel with one hand, about 1ft. from the muzzle, and twirling the ignitor with the other hand would fire the gun. This would keep one's head OUT of the way! It was a good habit to develop, until one could build an electronic ignitor and stand AWAY. NOTE: in the event the gun didn't fire a spud, IT MAY STILL HAVE FIRED. It was ALWAYS best to remove the welding rod and check for escaping pressure, before unscrewing the end cap for purging or re-fueling.
  7. 7) After a successful firing, it was safest to vent the gun by blowing clean air through the system. An air compressor works well, or the heavier-than-air gasses could roll out, when the barrel was pointed straight up. Air would enter the muzzle and purge the system in a minute or so.
    For serious experimenters, a supplementary file that includes plans for an electronic igniter, an assembly drawing of my experimental gun's pivoting carriage as well as mathematical equations to help calculate muzzle velocity and kinetic energy, may become available, if the demand is warranted.

Links

Return to Works In Progress
Return to Dangerous Hobbies