Art Car Progress: July-August, '06

Saturday, July 1: Took a break from production work and had my 60th Birthday Bash! I didn't quite get the art car running in time, but during the event I got numerous bits of input from various friends, concerning ways to improve on what has gone before. When I mentioned that I was still dissatisfied with the paint job my pal Johann mentioned that there's a very beautiful restored two decker in Stockholm. He's got photos and I hope to look at them in a few days. Apparently this vessel is black with gold trim, which seems like it ought to look very snappy. With luck I can do something more impressive than my "generic brown", possibly using spray paint and a few masks that will allow me to make quick duplicates of filigree around stern windows, etc.

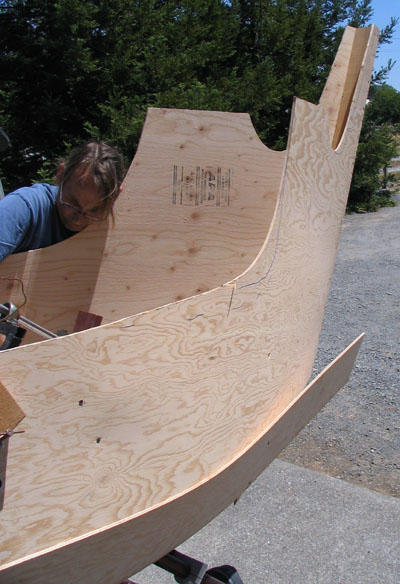
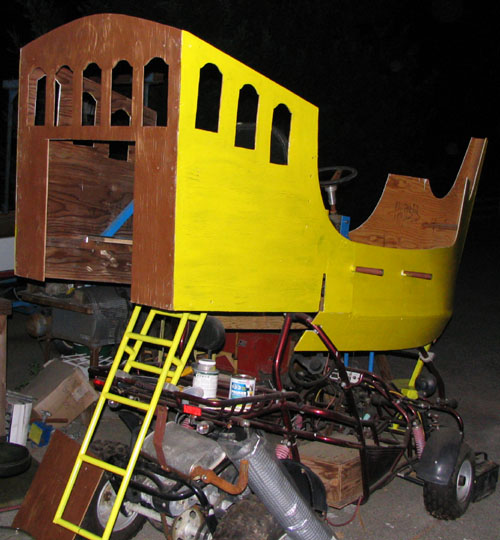
Sunday, July 2: Well, with the Birthday Bash finally in the past and with the throng of well wishers trimmed to the hard working few, Vern, Don and I got busy on the long-stagnant project once more. Fortunately I had a plan and we managed to stick to it pretty well. The addition of four arms and more brains than I have been able to muster for some considerable time made progress rapid and fun! Photos below.


Photo #1: No going back now! Side folding EL wire panels have been removed with the aid of a pipe cutter. Just in case I might find a use for them I kept the pipe stubs long enough to allow things to be coupled to them. One at least may become attachment point for a new boarding ladder, as soon there will no longer be room for the old one at the bow.
Photo #2: Starboard upper hull plank has been cut to contour and attached to existing driver's upper platform. Starboard lower plank is fastened to upper plank via three knees. Vern is hidden beneath, holding one of these knees at the correct position so that Don can fasten screw to the upper hull plank. Once all three knees are in place the lower plank will be screwed in place, completing the shape.
Photo #3: Short John Silver has now attained its full length: 11 feet! Lower planks have been screwed in place, but must be removed so that they can be trimmed to proper contours. I'll do this later after the crew have gone their seperate ways; having them here for the hard parts means we keep on with thre tricky bits that require multiple appendages, saving the clean up for me to do later!
Photo #4: Same crew as around this time last year: from left: Vern, Don and yours truly. It's amazing what all we get done and how fast it happens when the three of us get together! With luck we'll have one more conjunction in late August, to finish remaining fiddly bits, which are still a hefty heap!

Sunday, July 9: Days have been very hot, so I'm working the early morning and night shift. I haven't gotten a lot done, but it's great to know that I'm making progress every day. Life validation and all that, heh.

Photo #5: With most of excess plywood cut away and sanded smooth I started reinforcing the intersection of the starboard "planks" with 2" fiberglas tape and polyester resin. Sadly I failed to mask off the area (hey it's been a while since I've worked with the stuff!) and made a fair mess of it.
Photo #6: There was one place where the lower plank bulged out a bit too much, probably due to the lack of sufficient internal ribs. I made this widget to hold the bulging section's edge flush with the top plank's bottom edge until the fiberglas could cure. Sadly I undercatalyzed the batch and the next morning it was still tacky! But one 94-degree day finished the process; by nightfall it was solid.
The widget is sawn at an angle on top and this end is fastened to the upper plank with drywall screws. The lower end has been tapped 1/4"-20 in two spots and I've screwed 4" long pieces of allthread thru the holes. After I soak the fiberglas tape I lay it on the seam, then I turn the allthread pieces until they push the bulging section into alignment. A whole lot better than standing there for 24 hours!
Photo #7: Looking down at the joint between planks from the inside. Note 4 drywall screws holding the widget in place. Also note two "knees", made from bits of 2x4, beveled to match the angle of the lower plank. I'm sure the admiralty wouldn't approve, but fortunately this beastie doesn't have to float!

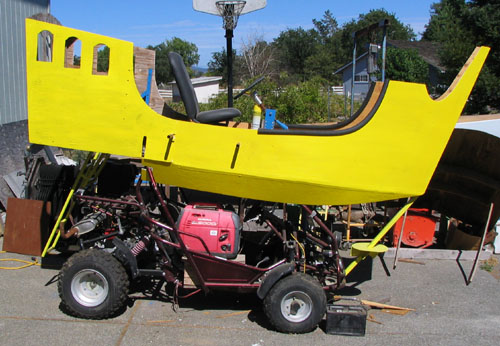
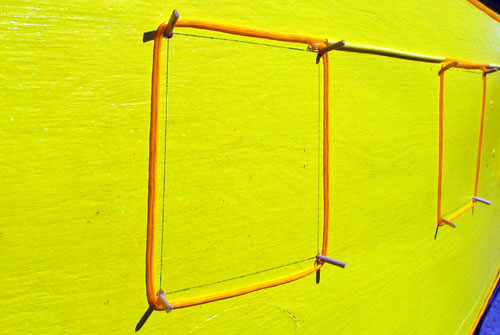
Tuesday, July 11: Starboard side taping sanded smooth; on to Port!

Photo #8: Port side gets the same treatment. I took the time to tape the area this time so the mess would be manageable. Exterior profile is starting to look vaguely nautical, yes? After sanding I'll tackle painting, then it's on to drive train work.

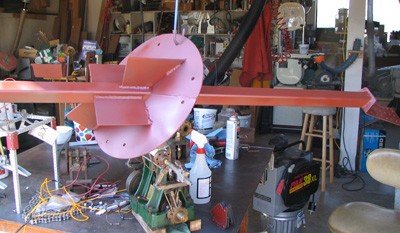
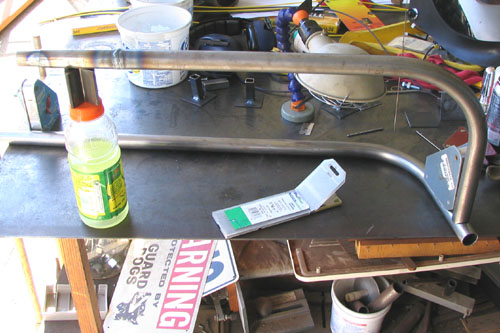
Wednesday, July 19: It took me a solid week to design and fab this one damned part, but it's finally done. Temperatures were in the high 90s most of the week, so I'm still working evenings. Lots of work with jigs, magnets, clamps, etc. I'll post some of this on my Jigs, Fixtures & Shop Hacks page when I get more time. The plasma torch and my little Econotig got a real workout too: ah, the joys of wearing long sleeves and a welding helmet in hot, muggy weather, eh? It was a royal PITA!

Photo #9: Any idea what it is? I couldn't get the whole thing in the photo, but all except the bracket at the far right was made from 1/8" steel plate or 1/8" wall square tube. Rustoleum primer done; next up: a coat of hooha yellow!
Photo #10: Here's a shot of the bow strut all painted up and in final position. It couples the bow to the art car's frame. The disk is tapped 5/16"-24 in 8 places. It was welded in the same plane and at the same height as a piece of horizontal frame tubing, so that a plywood "deck" bolted to the top of the steel disk can be made long enough to extend back atop a section of the art car frame. This will serve as a sturdy platform for anyone who wants to stand in the bow. I've sized it to fit my niece, who's just the right size!
Photo #11: Well, it ain't much, but with the bow strut installed I can at least say that I'm finished with the structural work. Next up: more fiberglas, then paint, followed by drive train test, then it's wait for the arrival of the gang to help me apply the electroluminescent stuff!

Monday, July 24: Absolutely punishing heatwave; over 100 for several days now. Have been working even later evenings and into the night. Have been spending hot afternoons in front of a fan with the doggies or heading out with SWMBO to air-conditioned matinees. Managed to see Pirates of the Caribbean and saw the exact embodiment of what I have had in mind for the tentacled monster enveloping the hull! Have also been thinking of reworking the monster so that trailing wagon is not enveloped by the critter, so that I can use it for other things that are becoming manifest, including generator, battery and supporting structure for aft end of sequenced waves. Have also been thinking of boarding ladder changes, as bow is now too tight. Stern entry seems to be best, so I'm working on this, which means sea monster body must be elsewhere. Called InflataBill and discussed it with him; turns out we're on the same tack, him and me, as he'd just seen the movie too! All is well; no time lost, much saved for both of us and much gained.

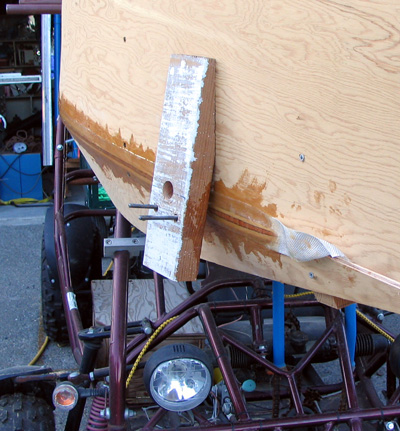
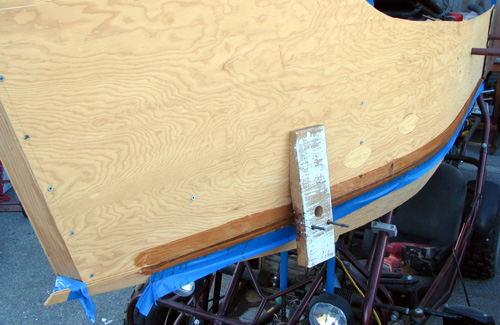
Spent last Saturday fiberglassing bow to reinforce plywood joints so the thing won't fly apart when being towed to/from the event. Finally got some graduated mixing cups and used the max catalyst, but the shit still too overnight to cure. Took time out after this was done to repair the orbital sander, which had blown chunks of rubber all over the driveway last week. Got last of fiberglas grinding done Sunday night once the temp dropped below 80.
 Managed to find a useful site that describes hacking the engine with photos and links: GY-6 Engine Performance. Followed his advice and removed the silly overly-complex air filter and have replaced it with a standard Uni filter. Old installation included three metric bolts and a Philips head screw that could only be accessed manually. New version eliminates all but the Philips, which I've repositioned so that a power tool can get to it. To attach the Uni filter I machined an adapter before I read, on the very useful Buggy News Forum, of a simple drainpipe hack that makes machining unnecessary; oh, well. My version is more compact at least...

 To do the air filter swap-out I had to remove the muffler and tailpipe assembly. I took the time to wire-brush the more visible rust away and painted it with high-heat BBQ paint. Got all reinstalled with Judy's assistance: it's a real 3-handed job.

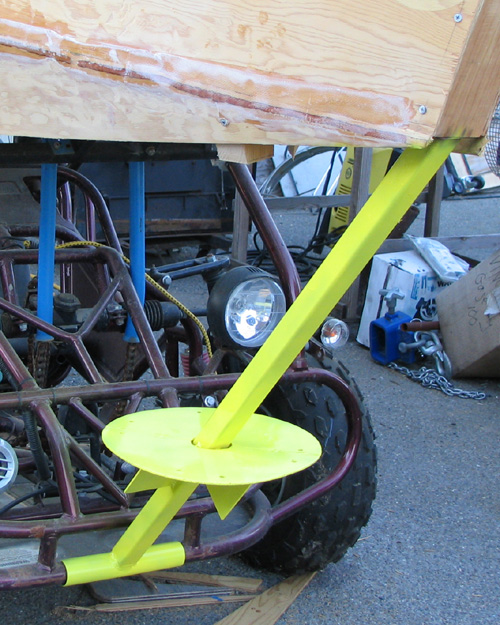
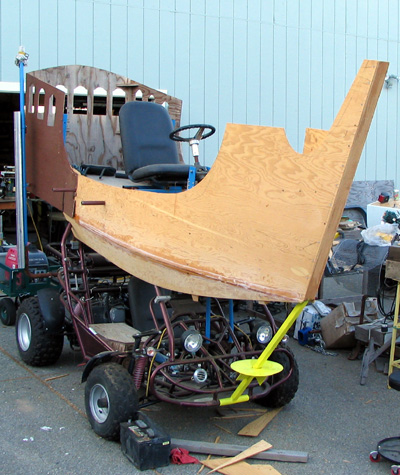
 Spending time at the aft end I've been looking at the unpainted and now-very-rusty vertical struts I made last yr to support the aft end of the upper deck. Now that bow ladder is gone I'm thinking it would be easiest to mount a new one on the stern. From the standpoint of stability this is also preferred over side boarding. All I've got to do to make it happen is to remake the supporting struts so that they angle upward as they ascend towards the deck, then cut away maybe 10" of deck. Next step will be to hinge the aft plywood piece of the captain's cabin so that it can be swung out of the way somehow. Then I can weld rungs and maybe railings and stiles to the sloping struts and I'll have something that's robust, out of the way and useful. Hope to get on the welding late this afternoon, weather permitting.


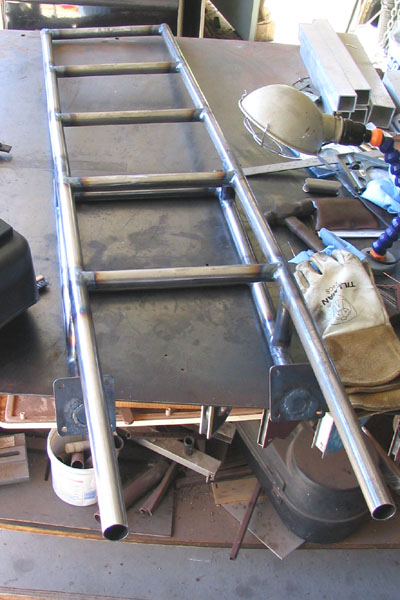
Sunday, July 30: Many tasks completed, large and small. Took 3 days (mostly learning curve) and fabbed a boarding ladder using 1" steel tubing. It's integrated into the aft deck support so all has become one unit. I've also done some measuring and I've determined that there's just barely room for both genny and battery on the aft cargo rack, so this makes the trailing wagon unnecessary. If there's time, when all is said and done, I'll decorate it and bring it along, but it'll only need to be used for hauling people. This should be within it's load capacity; I was a little worried about the skinny wagon wheels sinking into the playa with someone squatting atop the genny and battery.

Photo #12: A real timesaver when the task is to fit a bunch of tubing bits together. This here's one of those cheapie Harbor Freight tube mitering fixtures. It took a few homemade shims to get it working right but work it does.
Photo #13: Boarding ladder on the welding table. It came out reasonably square, which was a plus... Three days to fab, what with various interruptions and waiting for bits to cool before continuing. Ran out of yellow paint in the end, too.
Photo #14: Aye laddies! No need for lubbers to clamber over the sides like floppin' mackerel no more now't she's got a right proper boardin' ladder on her stern, yarrrrr!
Photo #15: Starting to look good from the side with the beginnings of trim added to the plywood edges. The black stuff is foam pipe insulation; I'll attach it with some contact cement once I'm convinced It's the way to go. The red thing is a 2kw Honda generator. When I can get a friend to help out (that sucker's awkward and heavy in the cramped quarters!) it's going to get stuffed onto the aft luggage rack where there's just room for it and a big-ass truck battery.

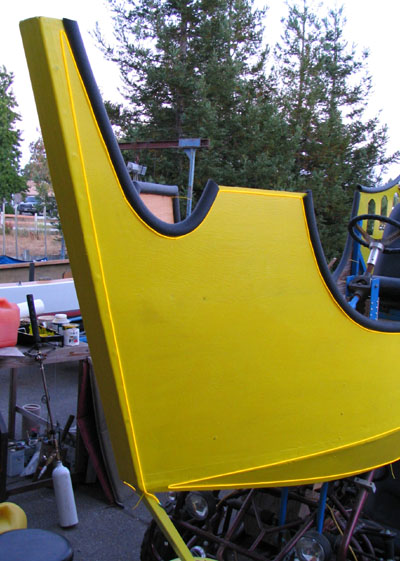
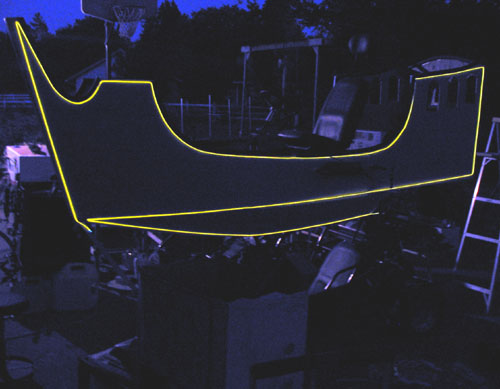
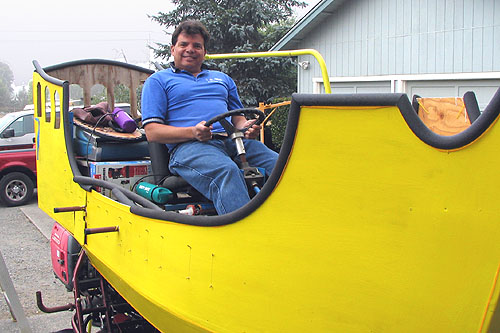
Thursday, Aug 17: Second coat of paint complete, foam edging mostly glued on, finally getting around to adding the EL wire! I've devised a method of attaching the wire to the vehicle that's a bit tedious to do, but it produces really fine results. Using a #35 drill I can fish a small, yellow zip tie thru from the backside, loop the pointy part around the EL and then pass it back thru the hole. The cubical buckle is too big to pass thru the hole, so when the point is zipped thru it and snugged up the result is a tight connection to the hull, with little of the connection method evident. This coming Saturday the whole gang's going to come over, including InflataBill with the sea monster, woohoo!

Photo #16: Towards evening on Aug 16: I've just fired up the first two runs of EL wire. Each side took 39ft to outline. I connected both port and starboard runs with a "Y"-connector so I could use one 12-v driver.
Photo #17: Dreadful Radio Shack knife switch on the left is very wimpy, provoding marginal contact at best. The only other common one I've been able to find at auto parts stores is on the right, but it's really overkill. I plan to whittle it down a bit so it will fit in the confines of the junction box.
Photo #18: The heart of the junction box is this puppy. It took a good bit of searching to find it! The secret: it's referred to as a bus, not a barrier strip. Finally found 'em at NAPA Auto Parts. I wire one end to the main battery, making sure the knife switch is on one of the legs. Then I connect Radio Shack voltage regulators to terminal pairs, to run my various EL drivers. Note polished bar on one side; the other one still has a year of neglect and Playa grunge to be removed.
Photo #19: Stylin'! Still a long way to go to beautiful but it's good to be started on the final phase. Next up: gun ports, yarrrrr!

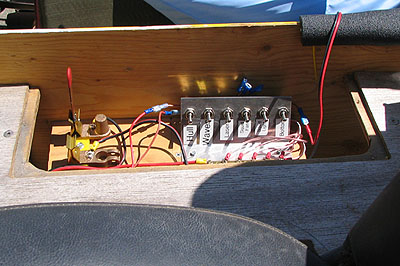
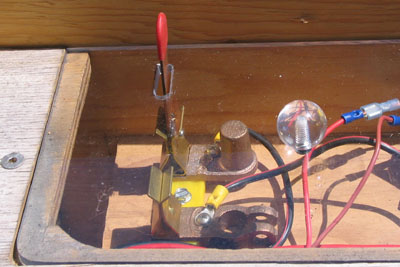
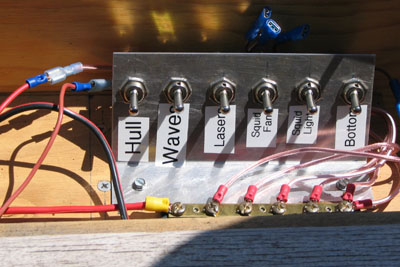
Saturday, Aug 26: Getting down to the wire! Thanks to a 4-day visit from Vern all wood and metal cutting, forming and installation for mechanical aspects of the build are completed. It was great fun for me, as usually I hold the parts while Vern does the welding (he's a mil spec certified weldor), but this time he did the holding and I did the welding. And thanks to Eugene's timely swing by the electronics store in Berkeley on his way to Tahoe for the weekend I now have enough Y-connectors to finish the wiring. Still lots to do, mostly at the electronics workbench but so far so good.

Photo #20: Close up of "gun ports" shows 1/8" dowels that I've glued into hull. I drilled the holes at an angle so that they'd hold the EL wire securely. I'll trim off excess wood with a pair of wire cutters. Note also yellow heat shrink tube slid onto EL between ports.
Photo #21: While Vern was busy spray painting stuff I came up with this bit of low budget jigging to position tubing parts for welding. This assembly connects boarding ladder with upper deck safety rail.
Photo #22: A happy Vern sits at the captain's station after most of our work was completed. Yellow thing to port is the safety rail, for clambering about without fear of falling ass over teakettle.
Photo #23: Shot of control panel I built after Vern's departure. At this point about half the wiring is complete.
Photo #24: Close up of safety interlock I devised on the fly, to make sure battery doesn't get drained inadvertantly. I made the cover out of Lexan so it should be stomp-resistant. A small light source will illuminate the interior so I won't have to use a flashlight to see what switch is where.
Photo #25: Circuits at my command, labeled and wired in what seemed like a logical manner to start up the visual effects. A few extra circuits will have to be piggybacked on these switches, as I ran out of room before I ran out of effects!

Return to the Art Car Project
Return to  Steamboat Ed  Haas
Please send feedback to: "Steamboat Ed" Haas